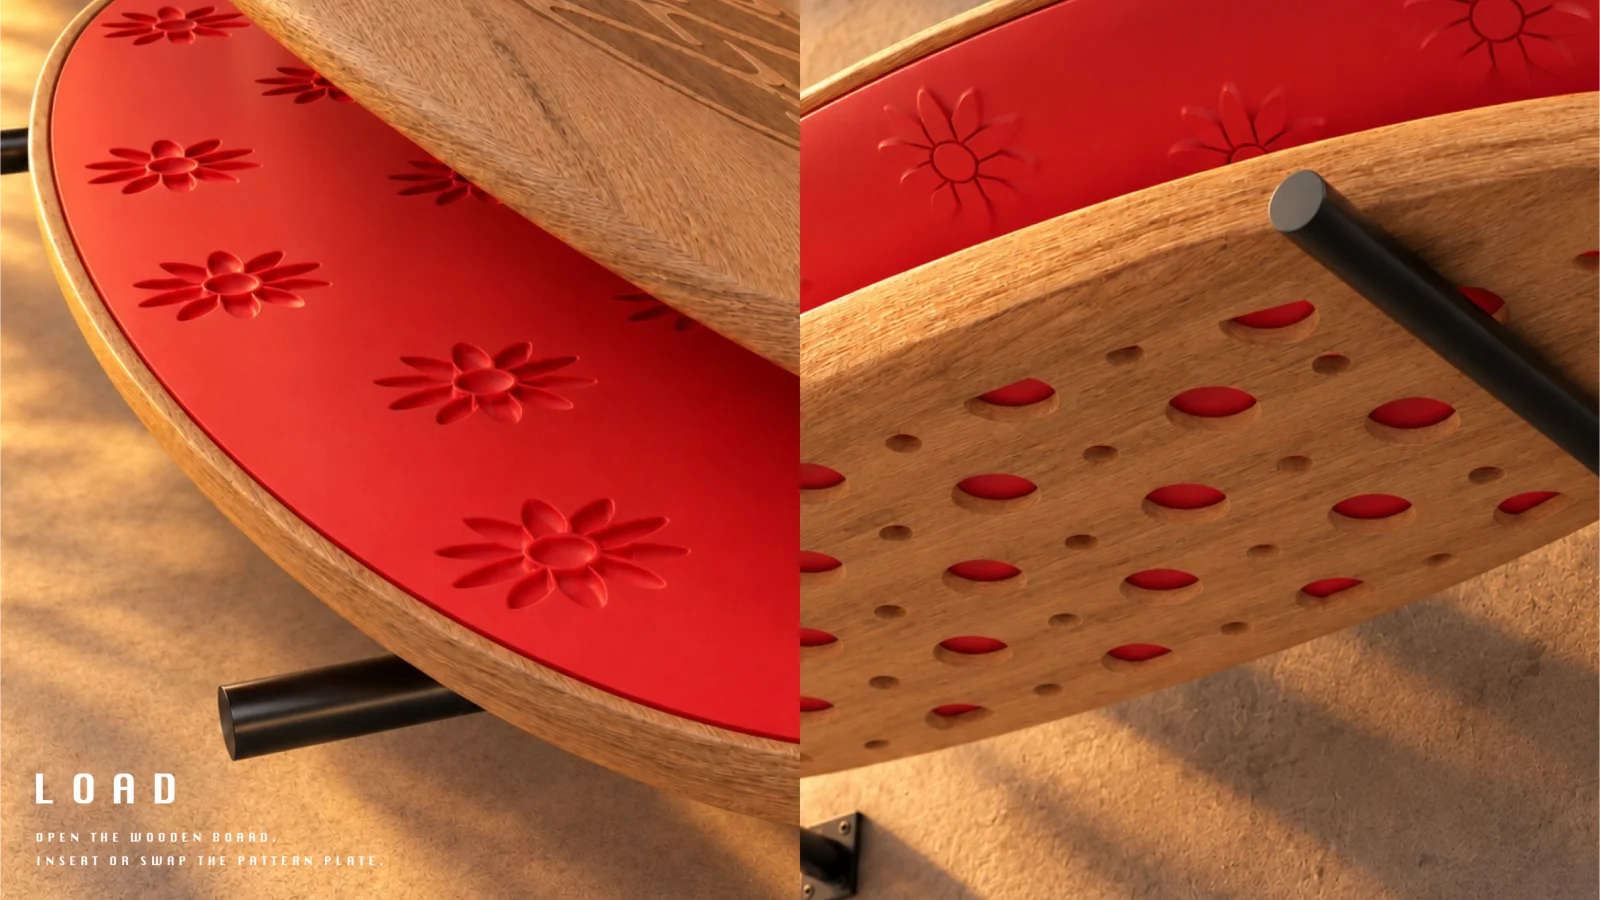
The outer shell brings warmth, weight, and a furniture-like presence to the room.
CREASE — Wear the crease
PRODUCT DESIGN / MATERIAL EXPERIMENT / UNIVERSITY PROTOTYPEKARL GEORR · 2026
We dress to
express.
Then iron
it all flat.
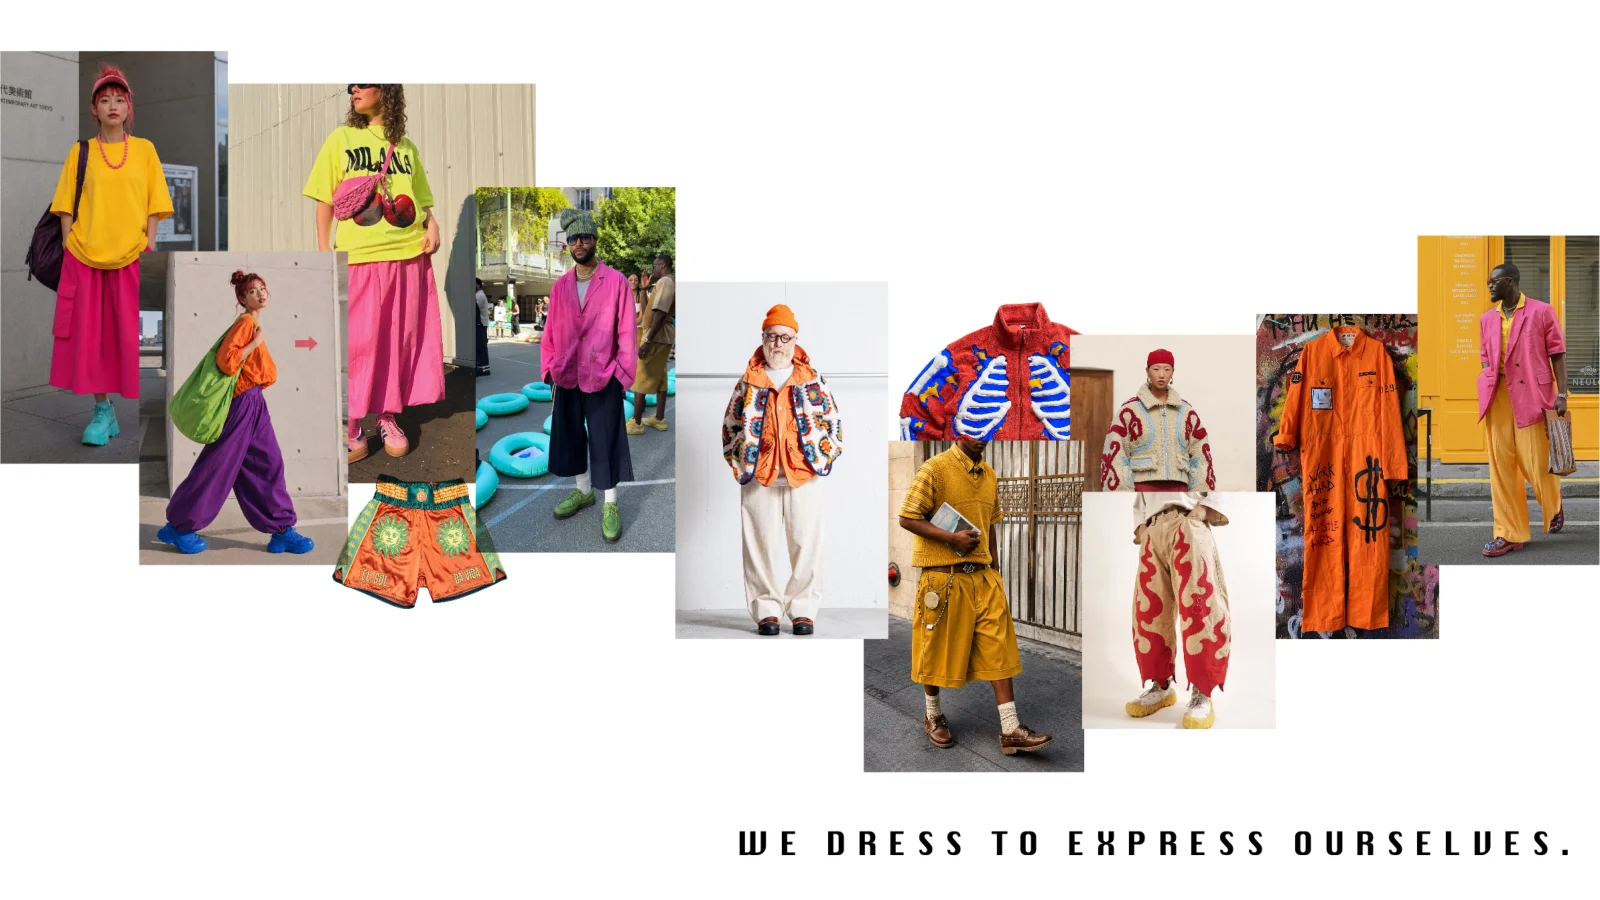
Clothes carry identity through their color, material, folds, prints, and silhouette. Yet one of the rituals around clothing is about erasing irregularity: flattening, smoothing, correcting.
CREASE begins with that contradiction. It asks whether the ironing board could create a visible expression instead of simply removing it.
What if the mark
was the point?
02 / LOOK UNDER THE COVERThe pattern
The pattern
was already
there.
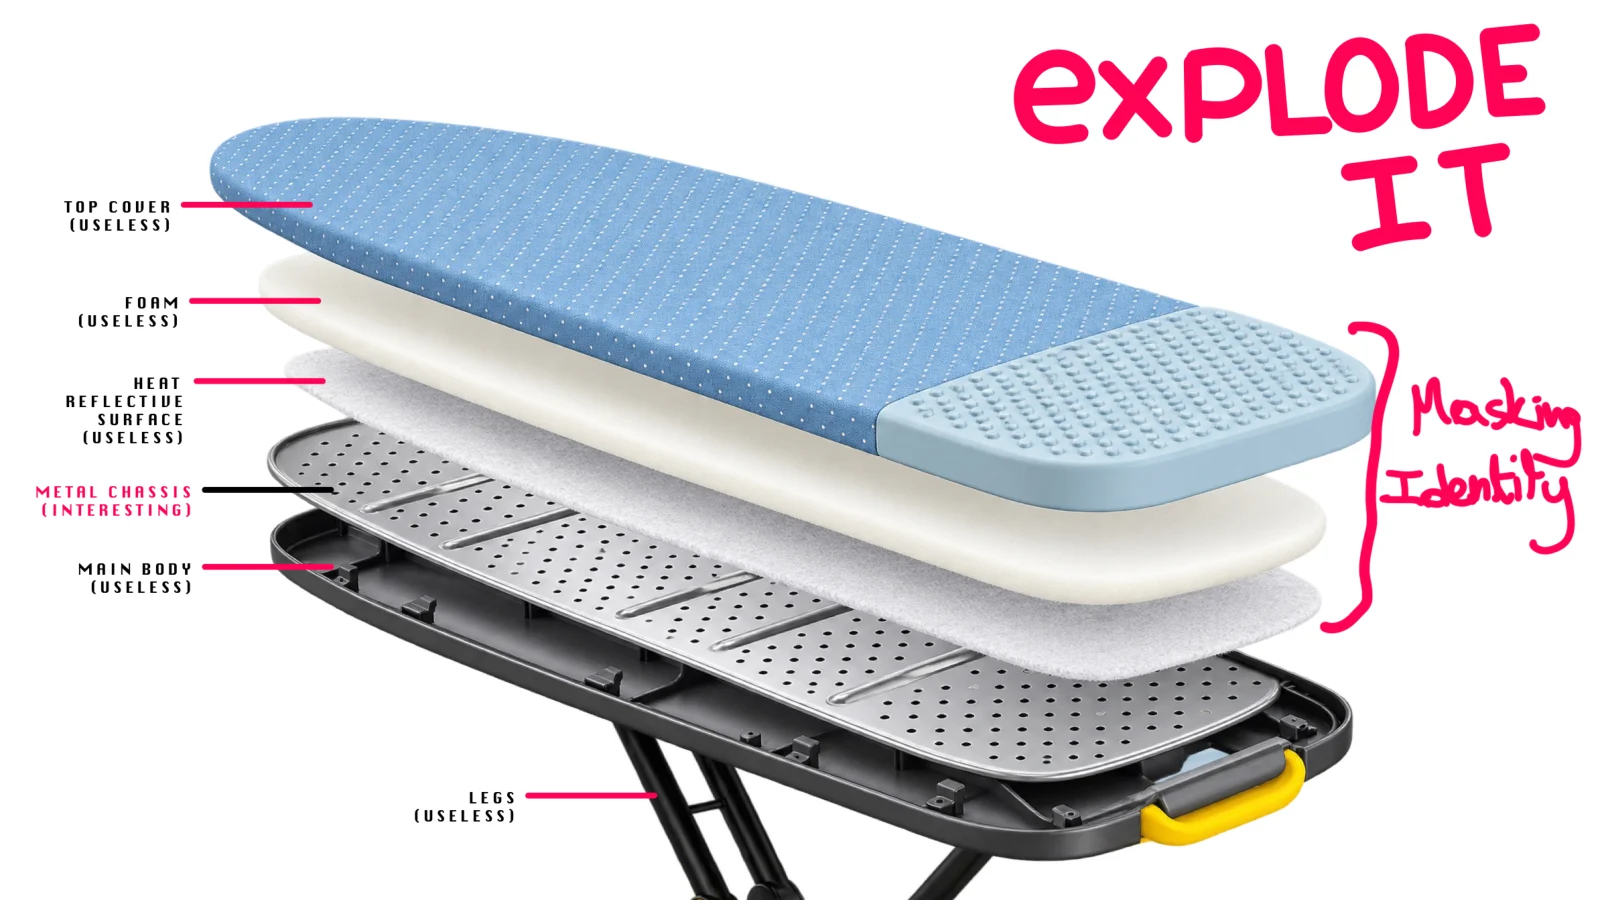
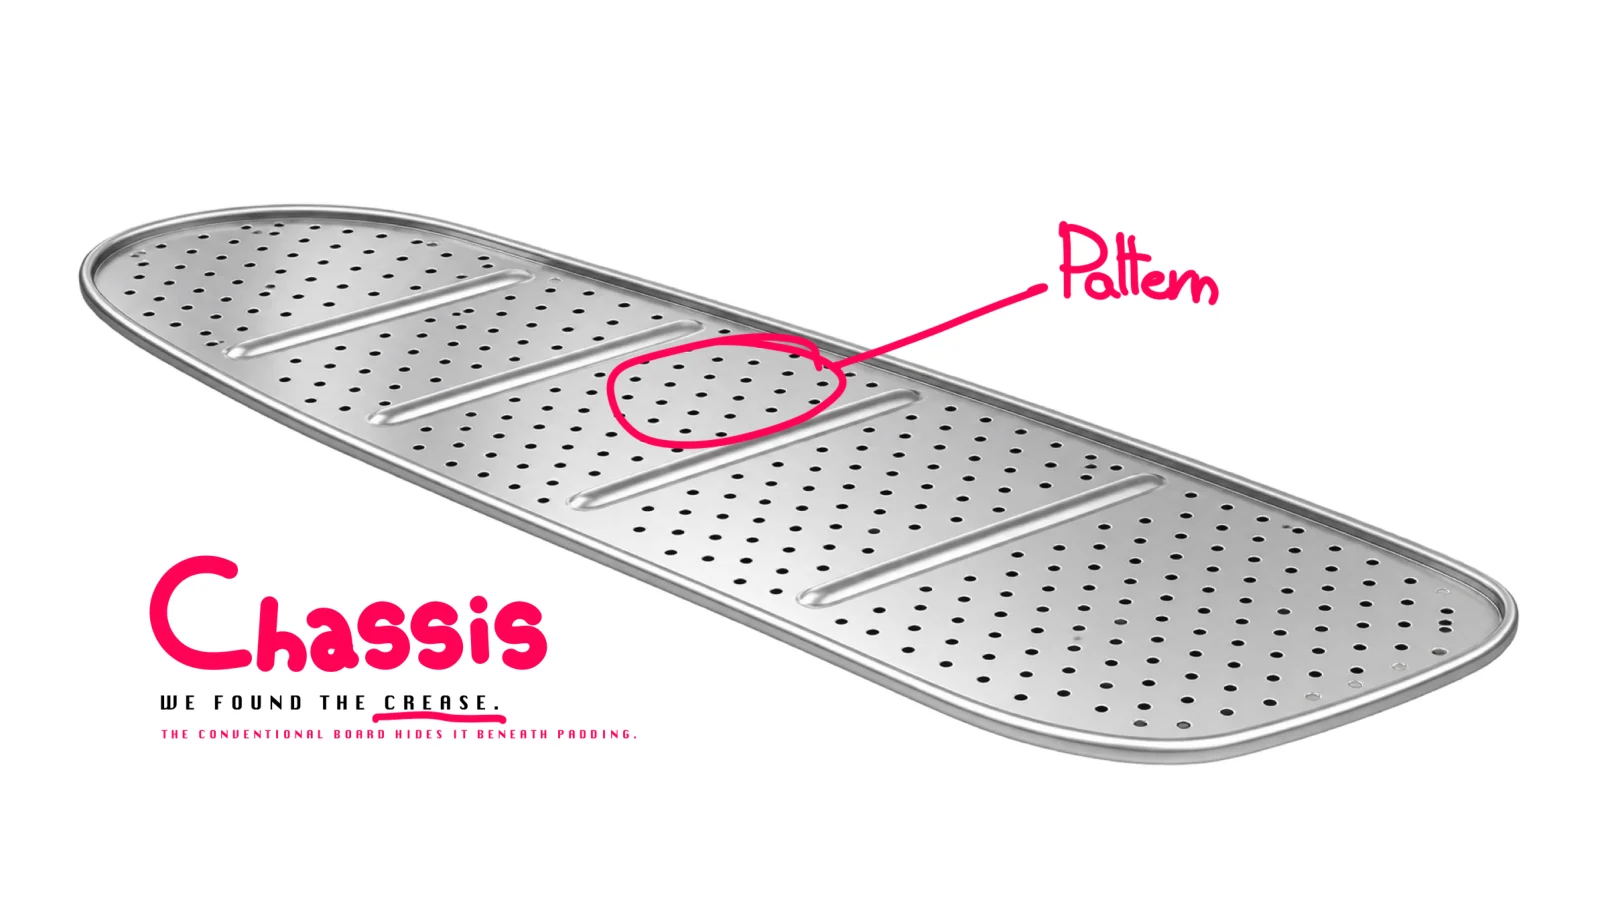
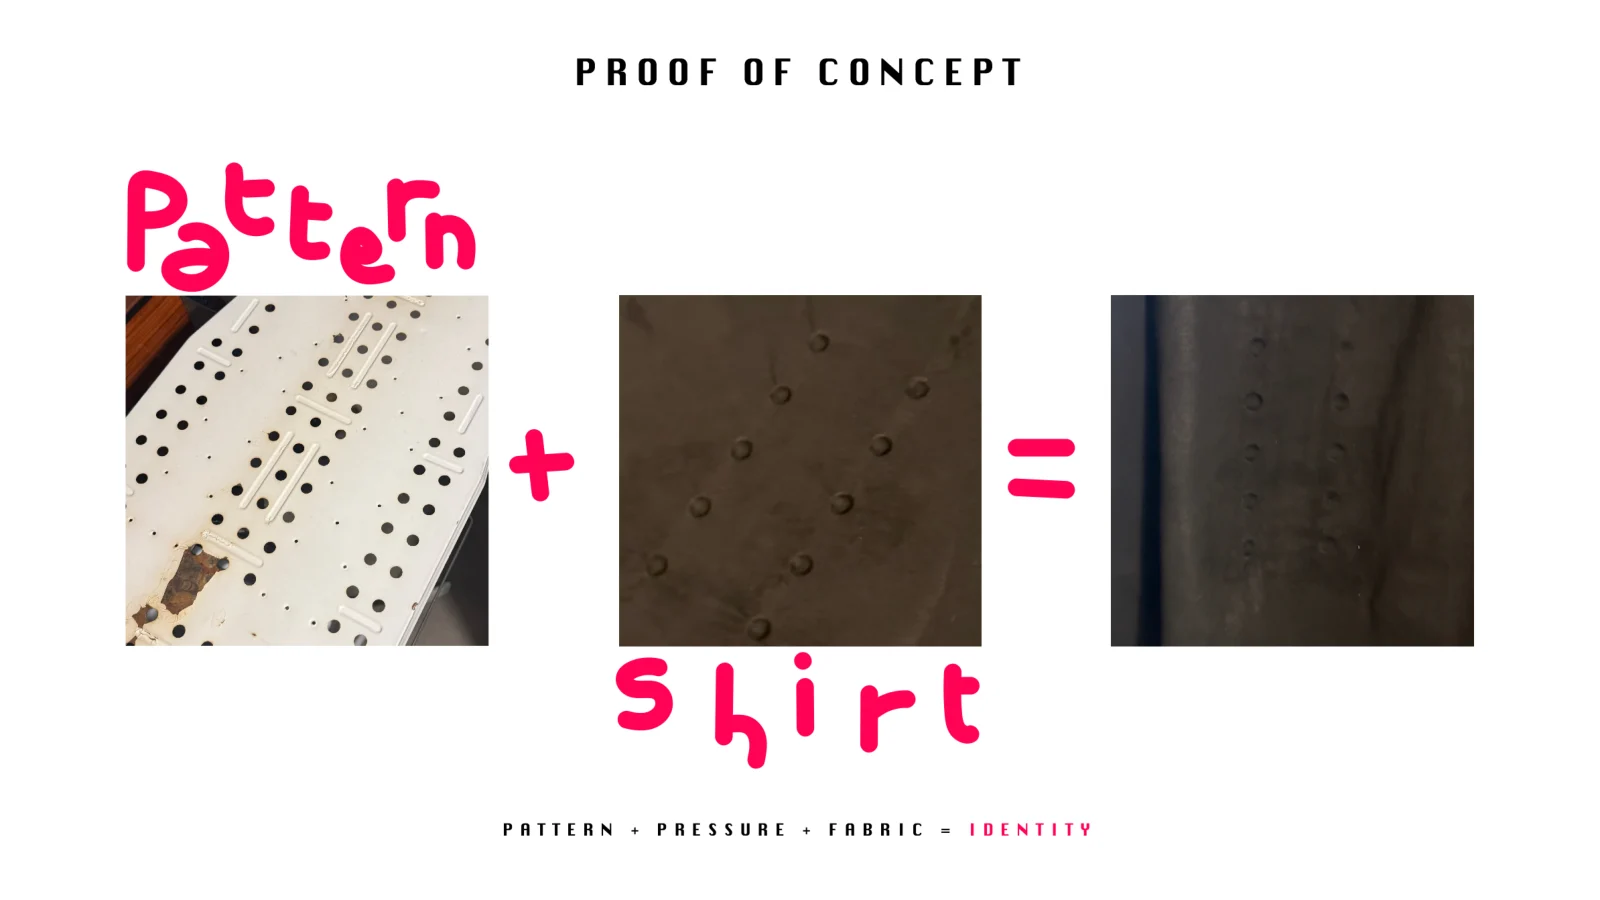
Taking an ironing board apart reveals a patterned metal chassis hidden under its padding and fabric. Usually, that structure is kept away from the clothing.
Here, the hidden surface becomes the source of the idea. The accidental imprint is treated as a material opportunity: a repeatable relationship between pattern, pressure, and fabric.
From accident
to intention.
The original proof-of-concept board records a simple physical experiment: the exposed pattern of an ironing-board chassis leaves visible marks on a shirt.
That observation provides a starting point for an object designed specifically to make those marks intentional. It is evidence of the idea’s origin, rather than a claim that the final product was production-tested.
04 / GIVE THE IDEA A BODYA board.
A board.
A press.
A presence.
The design moves away from a folding appliance that disappears into a cupboard. A wall-mounted oak shell gives the ritual a permanent place in the room, while the elongated silhouette keeps a connection to the original ironing board.
Sketches investigate the opening, the surface patterns, the wall relationship, and the components before the final form settles.
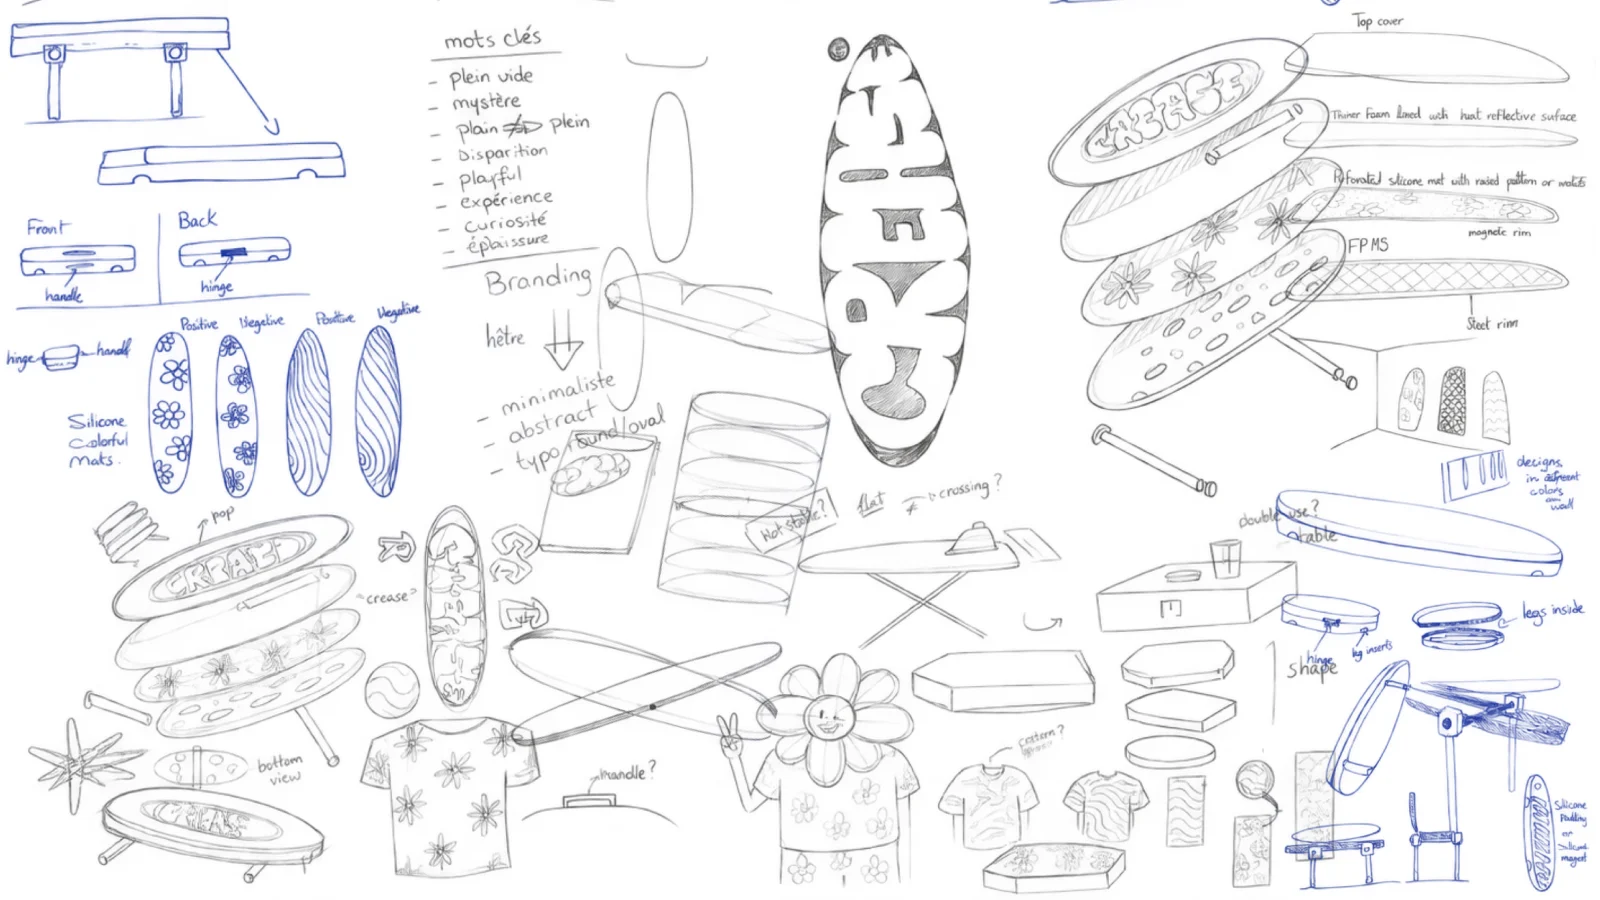
Interchangeable positive and negative pattern mats turn the surface into the expressive part of the object.
Dark supports, handle, and hinge make the opening and mounting structure legible.
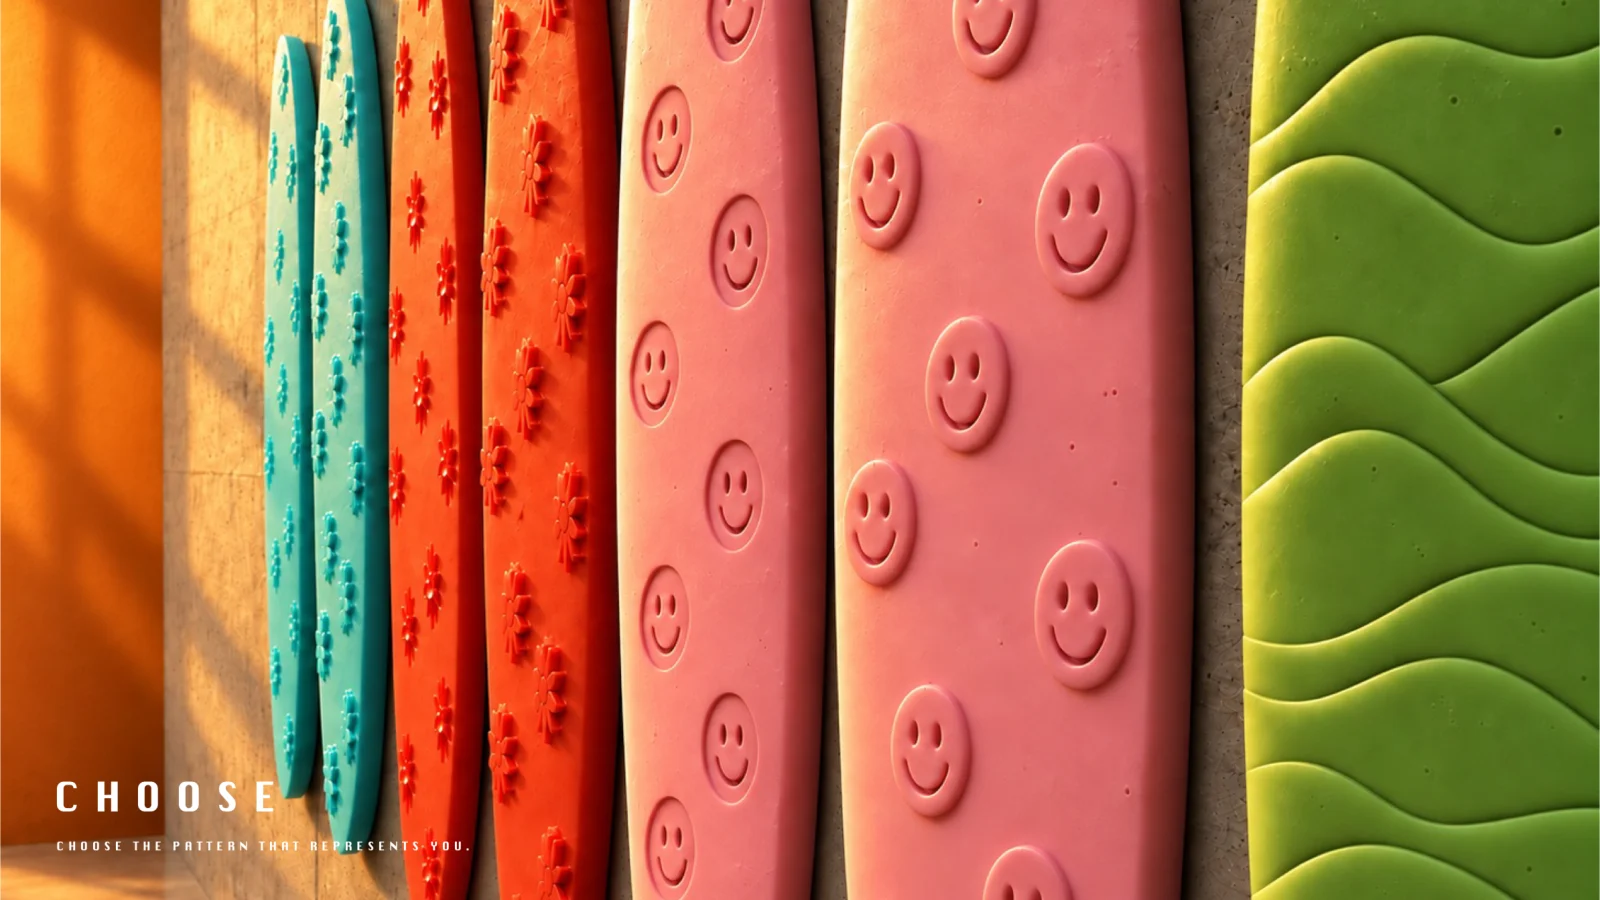
Each pattern has its own color, making the set feel collectible and easy to distinguish.
05 / A WALL OF POSSIBILITIESChoose
Choose
your mark.
The graphic identity is built around the same idea as the object: personality belongs on the surface. The bubble-letter wordmark, pink annotations, and colorful mats make the process feel expressive.
PATTERN PLAYGROUNDA surface
A surface
with something
to say.
Explore the six marks in the collection.
Daisy / ready to press
06 / THE PROPOSED EXPERIENCEChoose. Load.
Choose. Load.
Press. Wear.
A new object needs a clear ritual. The presentation follows the press from choosing a mat through loading, closing, and revealing the patterned fabric. The manufacturing study adds the steaming step to set the intended relief.
01 / Choose
Select the matching positive and negative pair for the pattern you want.
02 / Load
Fit the pair into the oak shell and lay the shirt flat against the lower mat.
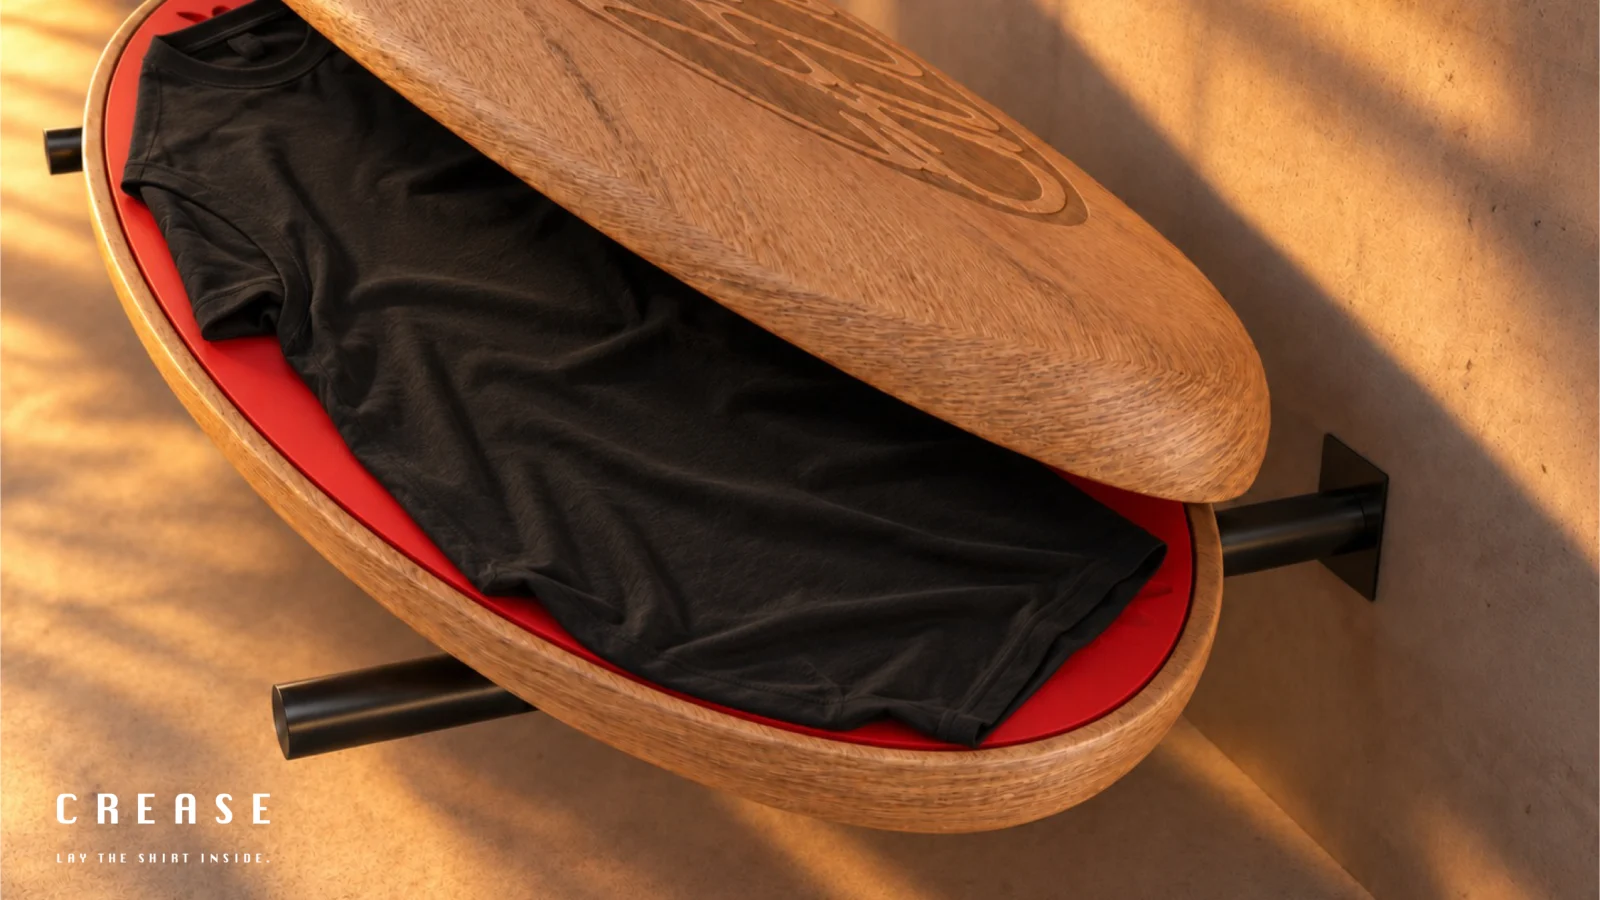
03 / Press
Close the two surfaces together so the pattern shapes the fabric between them.
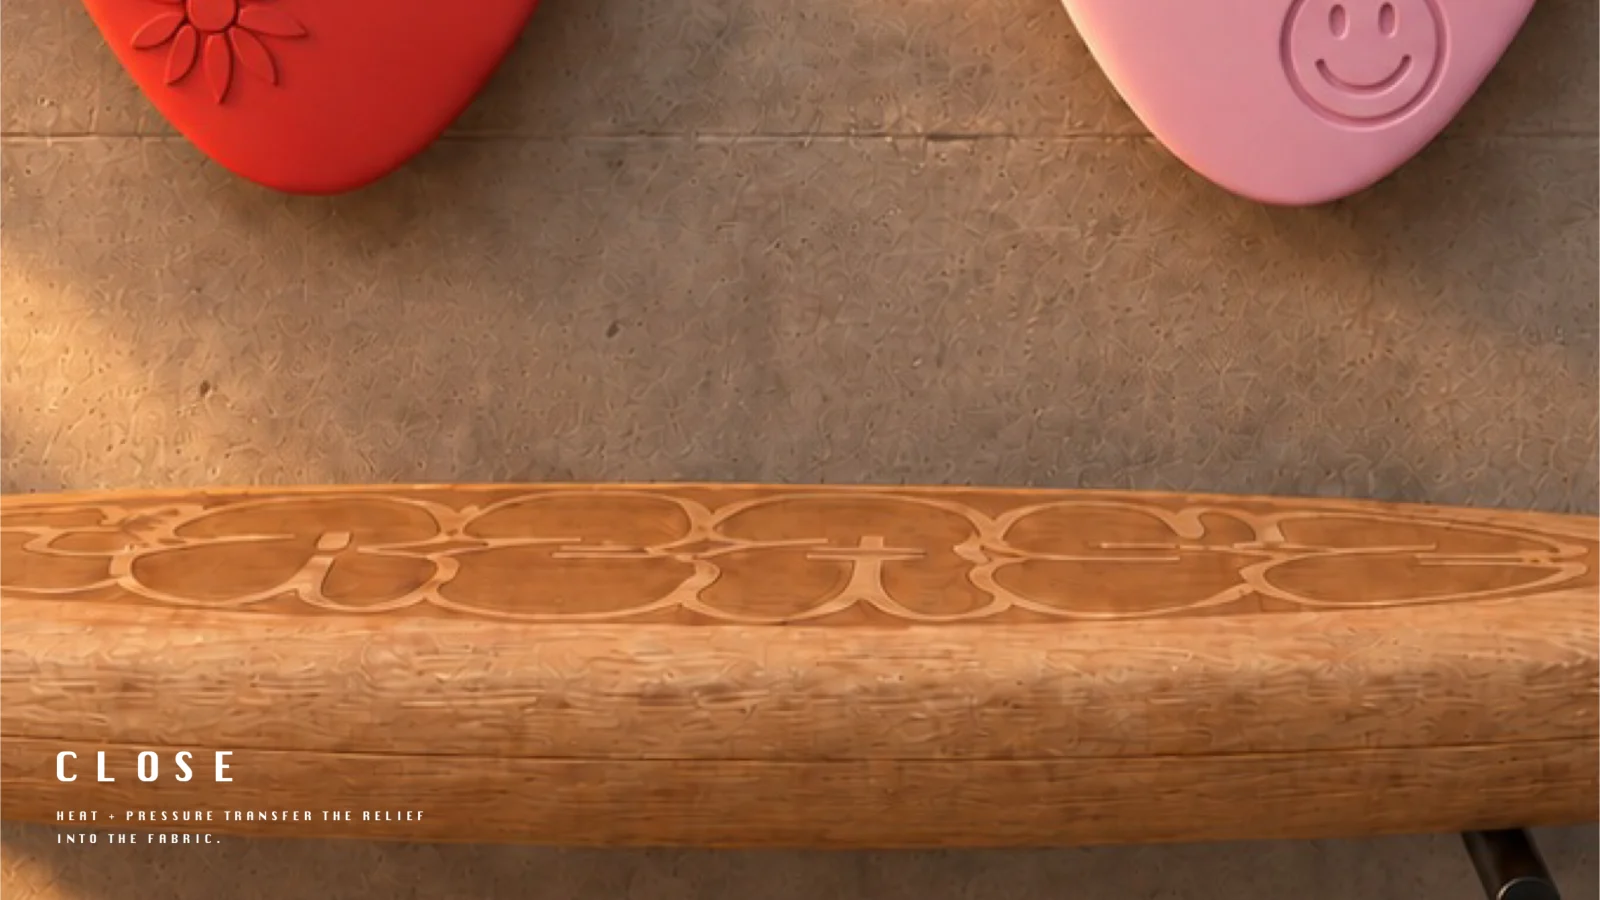
04 / Set
The proposed sequence then opens the press for steaming, with the fabric still in place.
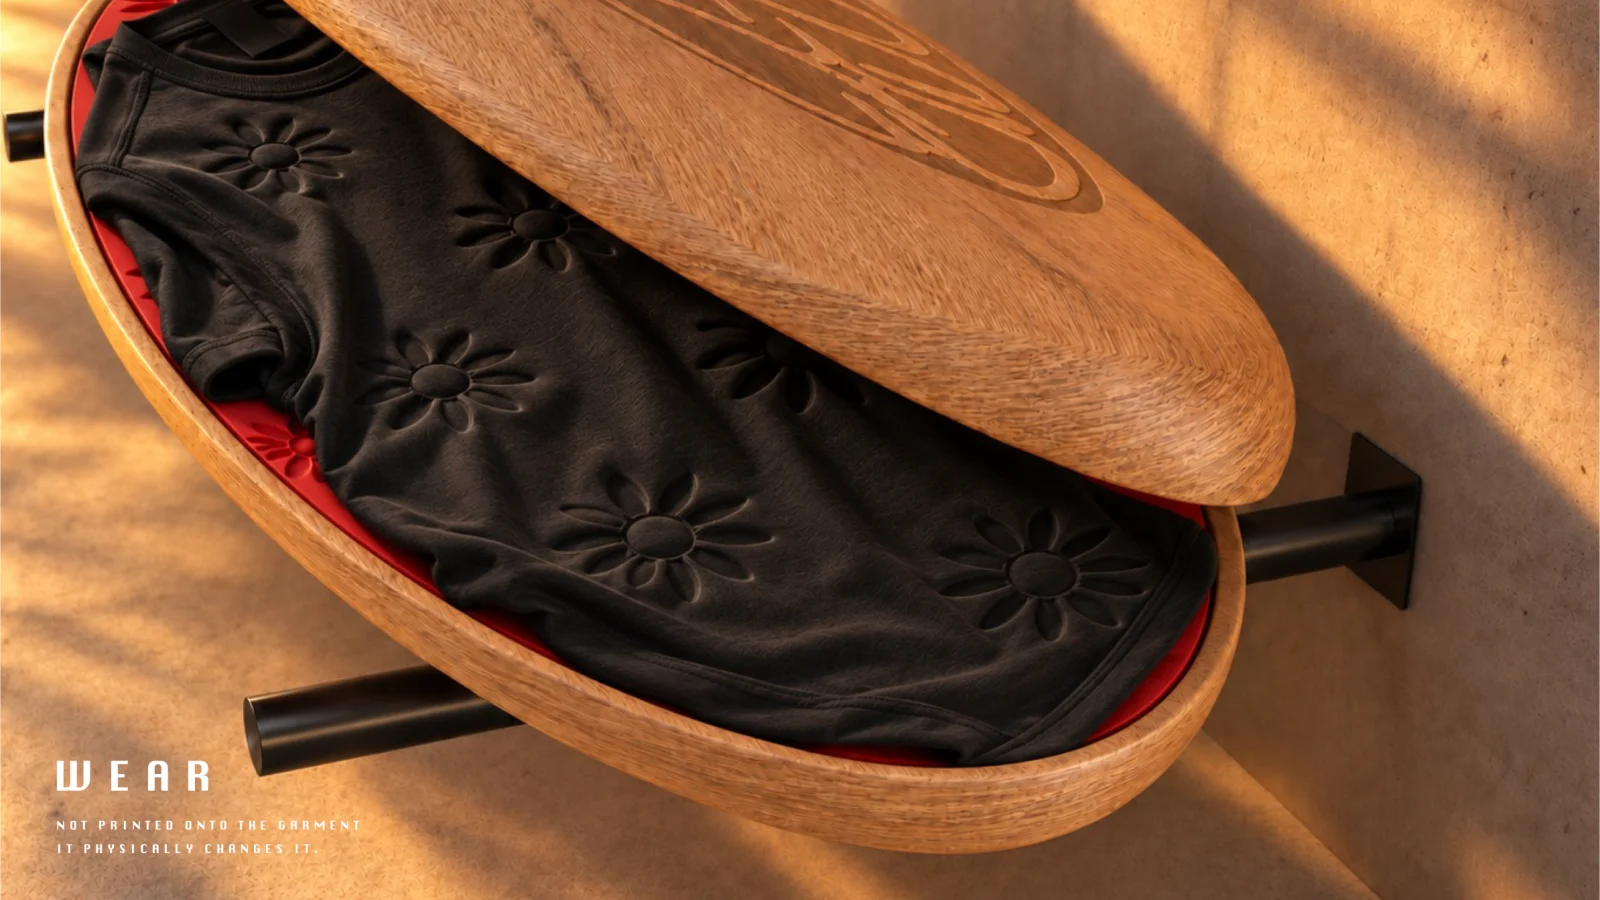
05 / Wear
Lift out the shirt. The final render shows the intended expressive texture.
Under
the surface.
The design-for-manufacturing work goes beyond the hero render. It separates the shell, mats, hardware, and assembly, and identifies questions that need resolving in the prototype: mat weight, hinge sizing, steam paths, and room for the fabric.
01 / The assembled object and its dimensions
The study defines an elongated oval shell, two wall supports, and an opening lid. These are design-development drawings, not installation instructions.
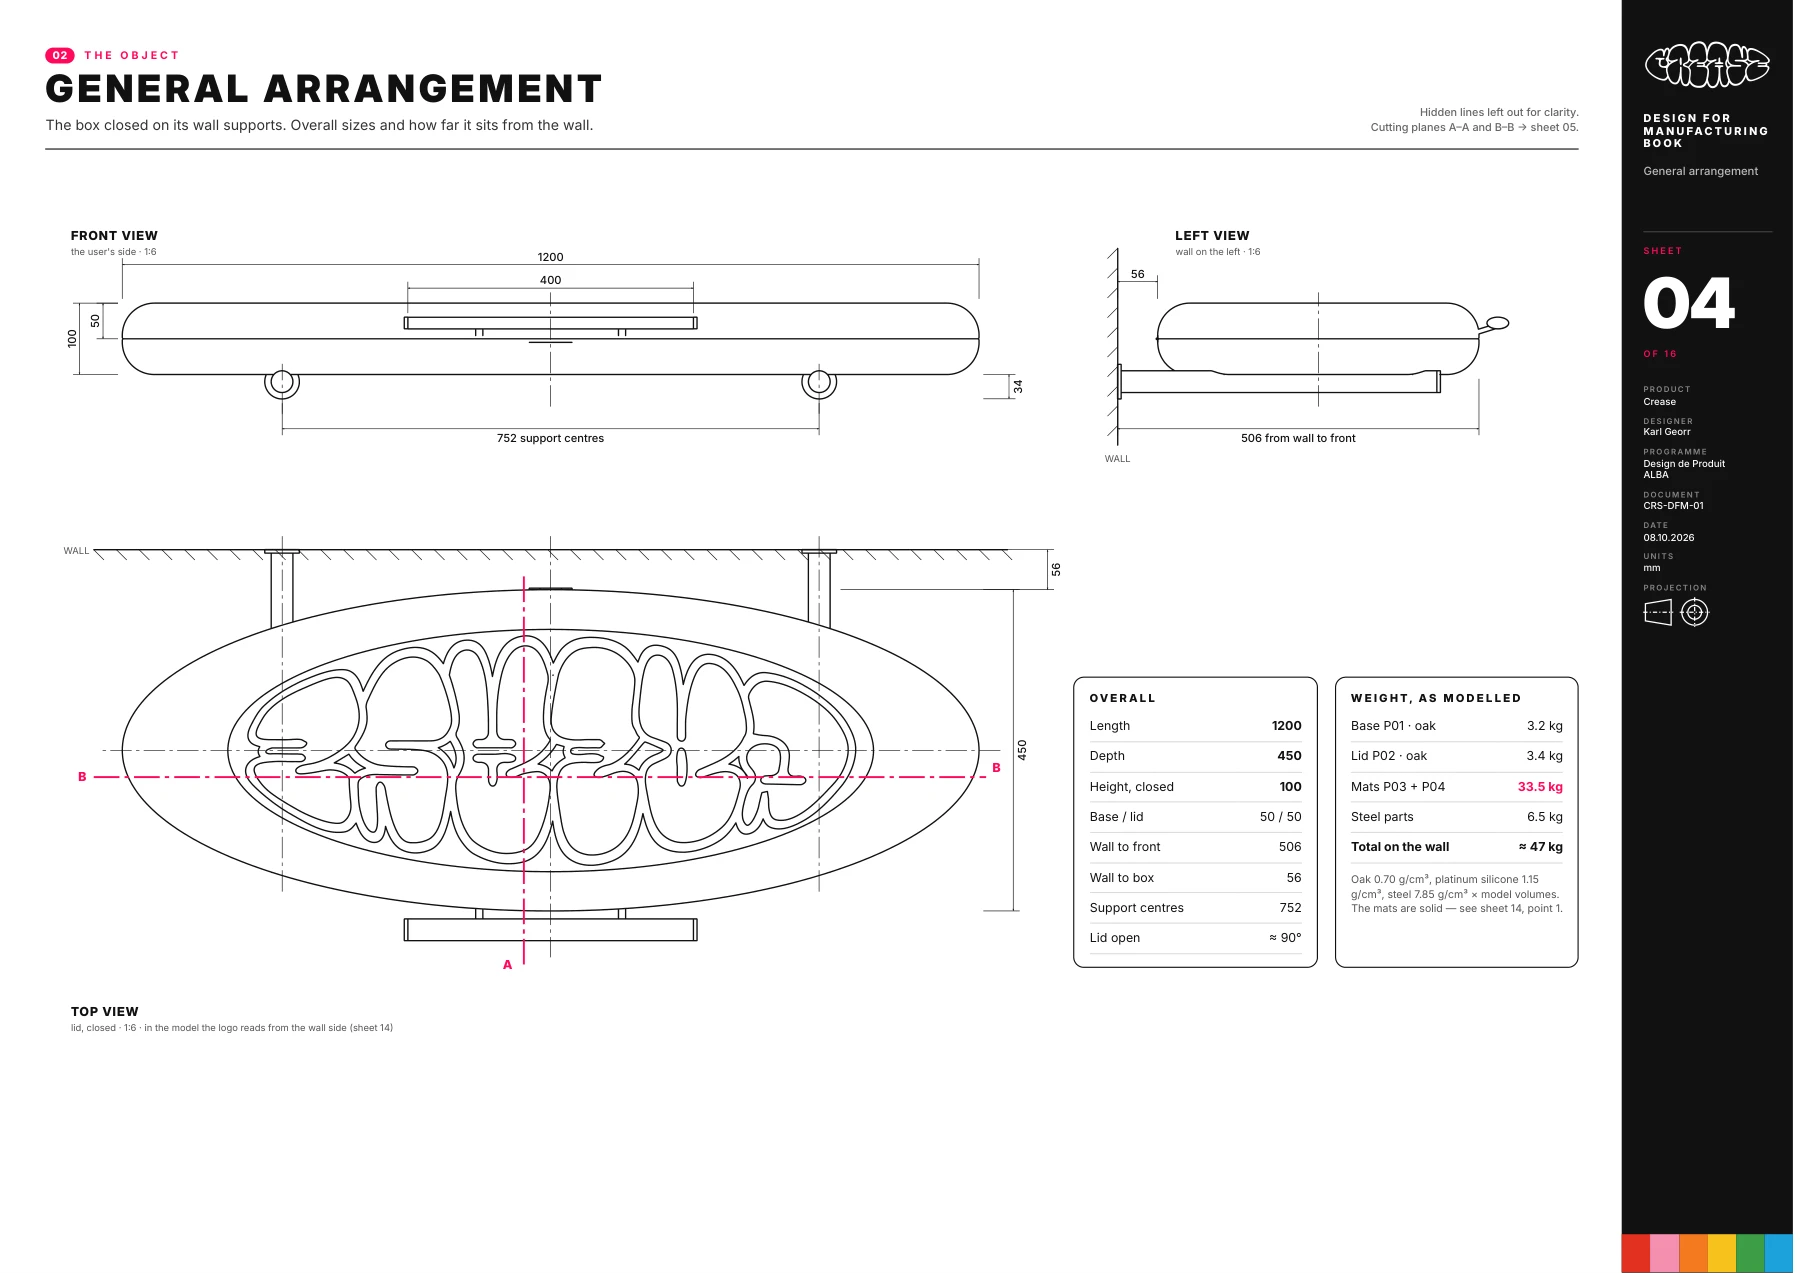
02 / Separating the parts
The exploded drawing makes the relationship between oak halves, pattern mats, handle, supports, and proposed hardware visible.
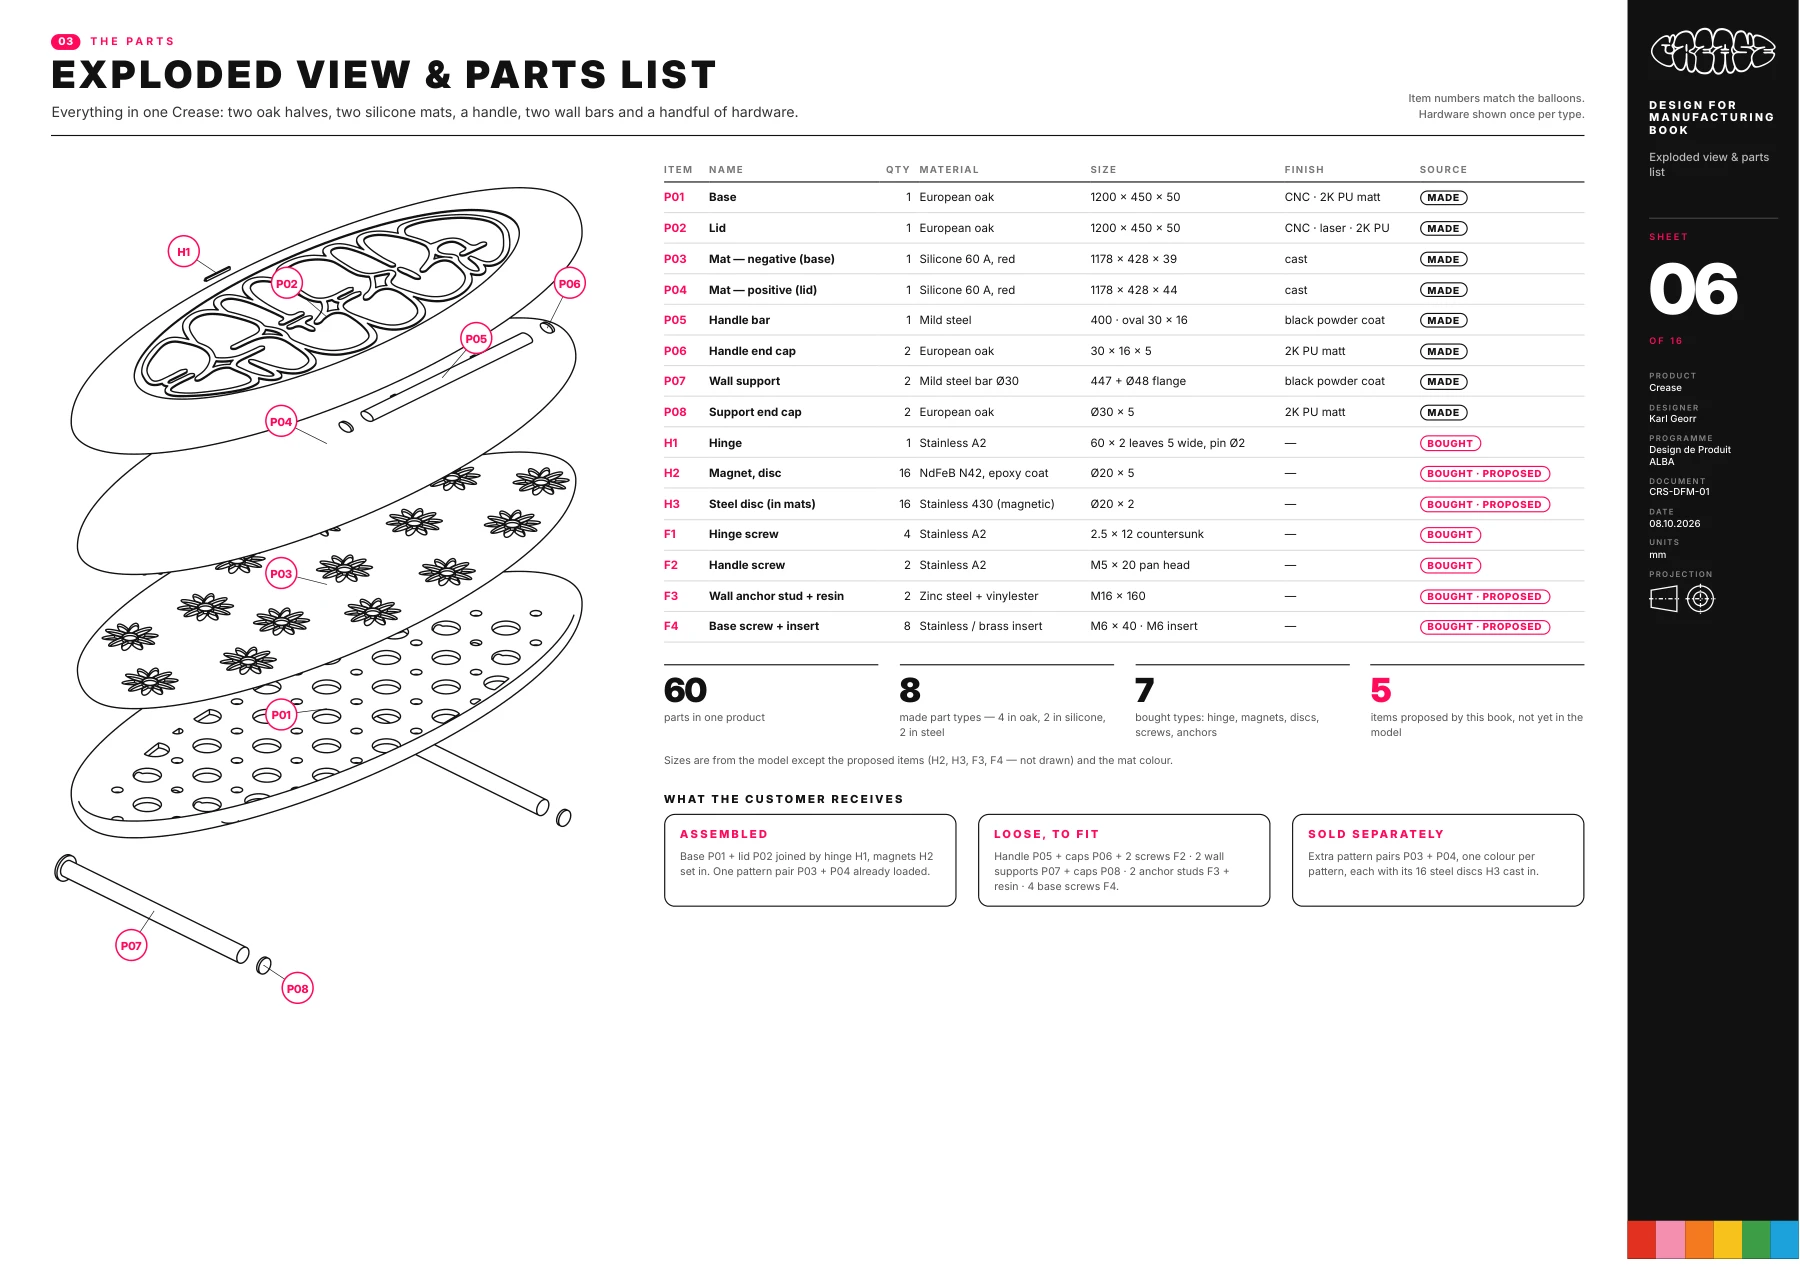
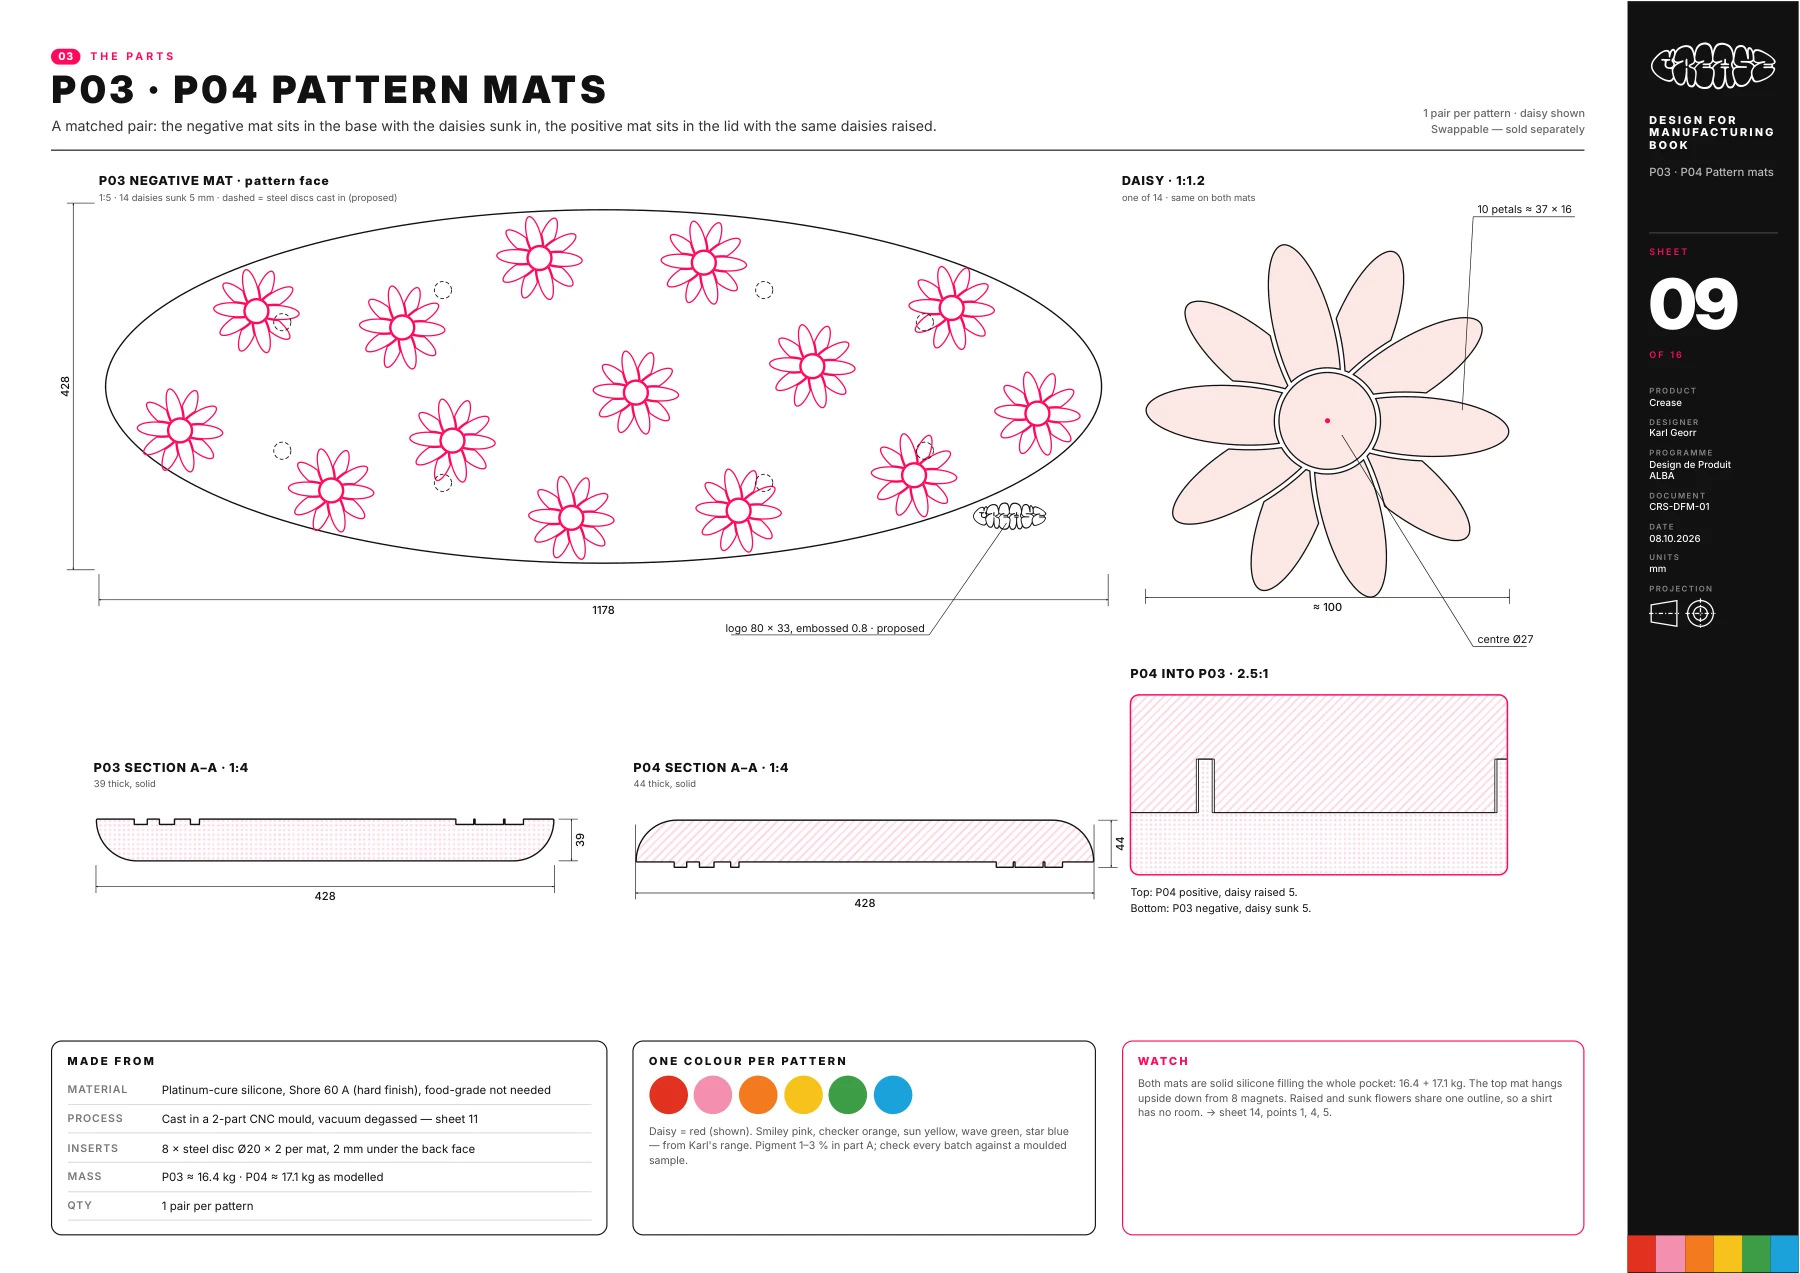
03 / Designing the positive and negative patterns
The two surfaces are developed as a matched pair. Their registration, thickness, and fabric clearance remain important prototype considerations.
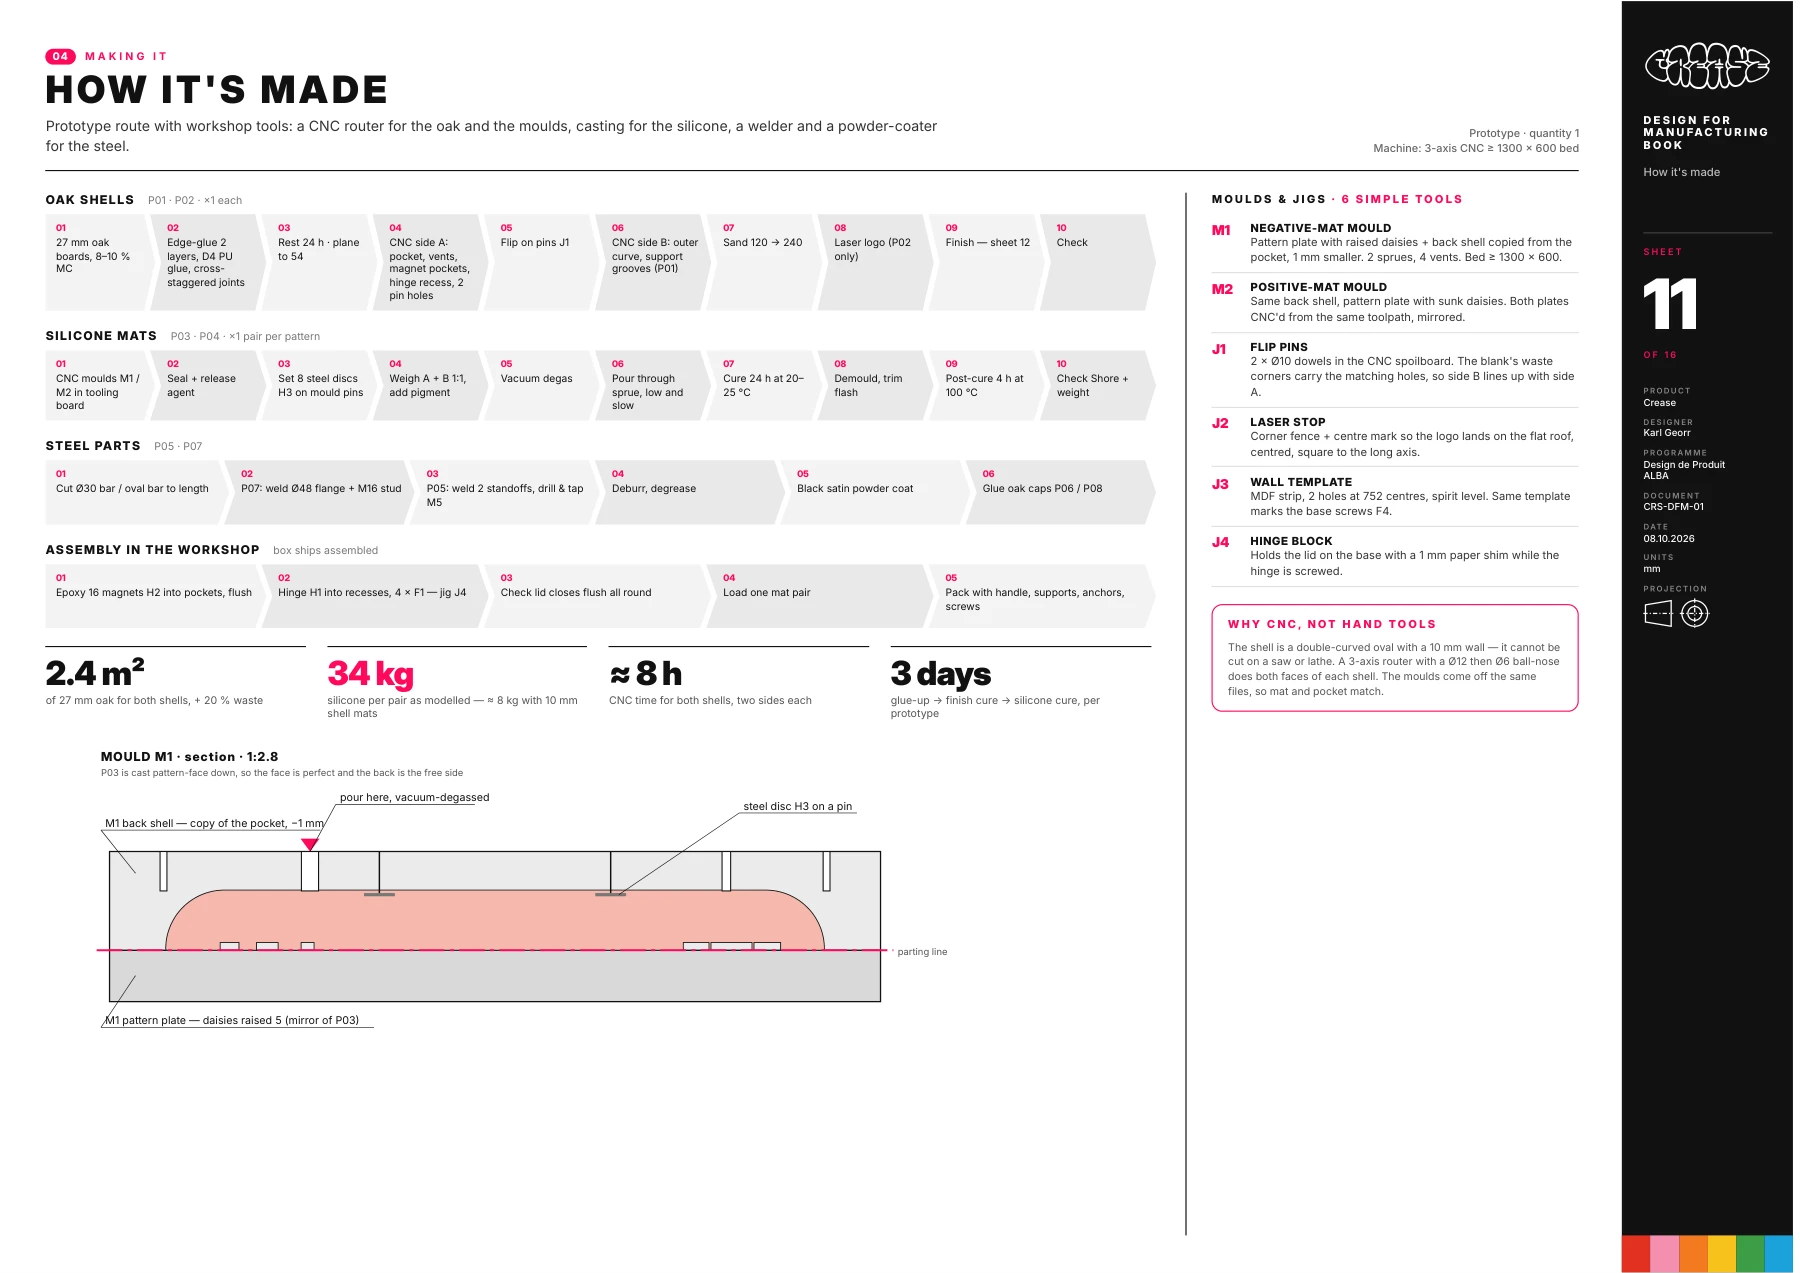
04 / The making sequence
The proposed manufacturing route maps CNC work for the oak and molds, silicone casting, metalwork, and assembly. It connects the expressive idea to the practical questions of making it.
Wear
the crease.
An everyday act of correction becomes an opportunity for creation.